Written by Andrew Dillon
Technical Consultant
Xynomix
Oracle Engineered Systems
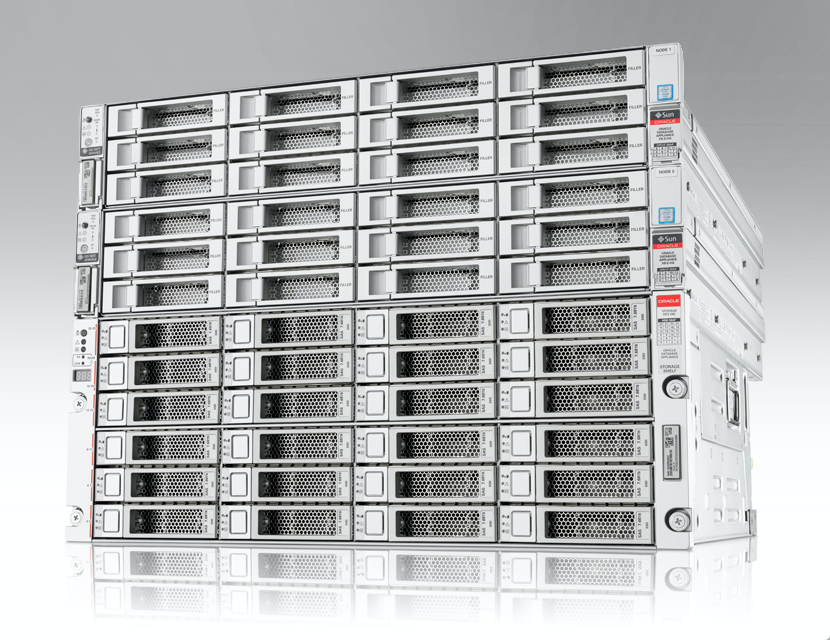
The Oracle Database Appliance (ODA) is part of the family of Oracle Engineered Systems, which are “integrated, full-stack solutions“ designed to “run crucial customer workloads faster, at lower costs, and with greater security than…”
…You know, the way we have been doing things for decades.
Here is the official description.
It really is a great idea, but like all great ideas, before you can really get behind it you have to build some confidence that it is really going to work as advertised.
So it was fun to play with the latest iteration of this powerful product, namely the X8-HA, and to plan a customer ODA migration from an older X5-HA database appliance. I simultaneously performed a multi-tenant conversion.
1. Setting up the ODA machines
The first part of the ODA migration is to re-image the ODA to the latest ISO image. In this case, the 19.9 ISO image extracted from the catchily-named patch p30403643_199000_Linux-x86-64.zip.
For this you use the “Integrated Lights Out Manager” or ILOM, which is launched from a browser (I used Chrome and it worked fine). The steps are all a series of clicks – which are quite intuitive (well, like a lot of GUI systems, they seem intuitive after you’ve managed to get it done and you are looking back on your notes!). But basically you select the ISO image, select Power Cycle, and when the system comes back up it has the latest ISO image installed.
Next you get to do some plumbing. But unlike the traditional skill set, which involves trying to loosen rusty bolts with hopelessly inadequate tools until frustration sets in and you end up calling a professional, this one just requires typing a command “configure-firstnet.”
Until you do this, the ODA machines have the default names of oak0 and oak1 and cannot be pinged from other machines. After the plumbing is done they pick up their real names and are on the network ready to use.
It’s as easy as that – your network is plumbed and, as a bonus, there is no leaking water all over the bathroom floor!
Next you install the software, which in my case was the 19.9 Grid Infrastructure (GI) as well as 19c and 12.2 database software. Simply download the appropriate zip files and issue the odacli update-repository command. You can watch the job running with the odacli describe-job command and finally the odacli describe-component will show the fruits of your labour:
					odacli describe-component
System Version
---------------
19.9.0.0.0

Component                                Installed Version    Available Version
---------------------------------------- -------------------- --------------------
OAK                                       19.9.0.0.0            up-to-date
DCSAGENT                                  19.9.0.0.0            up-to-date
ILOM                                      5.0.1.21.r136383      up-to-date
BIOS                                      52030400              up-to-date
OS                                        7.8                   up-to-date
FIRMWARECONTROLLER                        13.00.00.00           16.00.08.00
FIRMWAREEXPANDER                          0309                  0310
FIRMWAREDISK {
[ c2d0,c2d1 ]                             1132                  up-to-date
[ c0d0,c0d1,c0d2,c0d3,c0d4,c0d5,c0d6,     RXA0                  up-to-date
c0d7,c0d8,c0d9,c0d10,c0d11,c1d0,c1d1,
c1d2,c1d3,c1d4,c1d5,c1d6,c1d7,c1d8,c1d9,
c1d10,c1d11 ]
}
HMP                                       2.4.7.0.1             up-to-date

Local System Version
---------------
19.9.0.0.0

Component                                Installed Version    Available Version
---------------------------------------- -------------------- --------------------
OAK                                       19.9.0.0.0            up-to-date
DCSAGENT                                  19.9.0.0.0            up-to-date
ILOM                                      5.0.1.21.r136383      up-to-date
BIOS                                      52030400              up-to-date
OS                                        7.8                   up-to-date
FIRMWARECONTROLLER                        13.00.00.00           16.00.08.00
FIRMWAREEXPANDER                          0309                  0310
FIRMWAREDISK {
[ c2d0,c2d1 ]                             1132                  up-to-date
[ c0d0,c0d1,c0d2,c0d3,c0d4,c0d5,c0d6,     RXA0                  up-to-date
c0d7,c0d8,c0d9,c0d10,c0d11,c1d0,c1d1,
c1d2,c1d3,c1d4,c1d5,c1d6,c1d7,c1d8,c1d9,
c1d10,c1d11 ]
}

HMP                                       2.4.7.0.1             up-to-date
I have had a lot of frustration over the years using tools like runInstaller and dbca, often due to extremely slow and unreliable X-Windows connections, so this new approach gets a big thumbs-up from me!
The next step in this ODA migration is to Create the Appliance, which is easily done using the Browser User Interface which – again – was launched from Chrome. You just have to provide the names of both nodes (as this is a RAC HA install), SCAN IP addresses and VIPs, as well as the name of the ILOM which we used earlier.
Then you need to do some patching. Eagle-eyed readers may have noticed that my FIRMWARECONTROLLER and FIRMWAREEXPANDER were showing as not up-to-date, but this is easily remedied by issuing the update storage command:
odacli update-storage -v 19.9.0.0.0
After this everything showed up to date and life was good. Next step was to use the Browser User Interface to easily create the Oracle Homes (12.1 and 19c in my case).
With this all done it was time to perform a test migration of the database.
2. Performing a ODA migration test run
The first thing to do was to build a standby of our existing production database.
Annoyingly, the duplicate from active database command, which I have found to be a great tool, wasn’t working due to a bug in the out of date Oracle version of the source database.
So, to work around this I decided to do a manual restore and recover, and then set up the Data Guard Broker to do the managed recovery and get the standby in sync with production. With standby databases it doesn’t matter much which approach is taken as long as it gets built because all the time you are working on it you are not affecting production in any way. And this one was built so time to move on!
After this I enlisted the help of the snapshot standby feature which is a wonderfully powerful and flexible tool that lets you try things, mess them up and then flash back to a time when everything was working fine, before trying a different approach to see if it worked this time. If the plumbing industry had such a tool, I may have chosen a different career…

After converting the existing standby to a snapshot standby I was ready to try another of ODA’s bag of tricks and upgrade the database in one command: odacli upgrade-database.
By specifying the 19c home in the -to parameter the ODA knows to upgrade your database to 19c and you can follow progress using the odacli describe-job (as well as doing a tail -f on the alert log and even searching for the dbua upgrade logs if you are so inclined).
Unfortunately mine failed with a java error – some issue with the Oracle Java Virtual Machine (OJVM) which may have been as a result of a patch gone wrong on the production database at some time in the past. I opened an SR (Service Request) and the helpful Oracle analyst pointed me to some relevant docs, one of which suggested I rebuild the OJVM with a simple script.
So, after flashing back to physical standby mode courtesy of the cool snapshot standby feature, I was able to try again. After once again converting to snapshot standby I rebuilt the OJVM as advised, and reran the upgrade. This time, the upgrade completed successfully.
Next I created a 19c container database (CDB) using the Browser User Interface. I chose the ACFS option which carves out ACFS filesystems for storage and redo out of the ASM DATA disk group and auto-expands it as necessary. This is a very nice feature!
To plug in my newly upgraded 19c non-container database I first needed to generate an XML “manifest” file. To do this I put the database into read only mode and ran the appropriate script. With the XML file created I was able to check it against the 19c CDB to see if it really could be plugged in, i.e. if it was “plug compatible.” The result from the script came back with a resounding YES. Well, it really just said “YES” so I suppose it didn’t really “resound,” but for me it was a glorious sight!
Heady with this recent run of success I plunged straight into the plug-in process and after 45 minutes or so it finished without error.
As the new PDB was being built, I amused myself by watching the ACFS filesystem continually expand as needed (after so many issues over the years caused by out of space conditions it was a beautiful thing to behold!). I used the ‘plug in with copy’ option which meant that I still had my original upgraded non-CDB database sitting around, which I then proceeded to flash back to a physical standby using the snapshot standby feature (did I already mention that snapshot standby is a very cool feature?).
Depending on how big your database is you may not have room to keep both your standby and your PDB around, but for our 2TB database there was more than enough space.
The noncdb-to-pdb script was then run to “tidy up” the database and complete the plug-in process, and all that was left was to open up the pluggable database (PDB) for testing.
Everything was good until I started noticing some unwelcome ORA-07445 errors in the alert log. Again it seemed to be OJVM-related so after another SR was opened the friendly Oracle analyst suggested I turn off the Java “just in time” compiler – by setting the java_jit_enabled parameter to FALSE.
Sure enough the errors stopped, and I waited on the testing to complete to determine whether we needed to turn it back on. The Oracle analyst suggested that a reboot before turning it back on might clear the issue.
It did!
3. Conclusion
Overall I would say this was a smooth ODA migration and a good experience using the X8-HA appliance. A couple of tricky issues popped up along the way, but Oracle were quick to respond and they provided enough information to keep things moving forward.
Of course, this was only a test run of an ODA migration, but the live migration will be a lot easier now that I already have an up-to-date standby in place and I know the steps I have to take to make the upgrade and plug-in a complete success.
This is a great way to quickly and easily migrate customers away from unsupported, out-of-date systems up to the latest version of Oracle.
Two thumbs up from me!
For more information on how Xynomix conduct database migrations, check out our Root-5 Success Story or visit our dedicated Database Migrations page.
Contact Xynomix
Xynomix has unrivalled experience across the full range of Oracle and Microsoft SQL server database environments and are, therefore, perfectly positioned to offer independent enterprise-grade support to keep your critical systems up and performing perfectly. Get in touch now on 0345 222 9600 or via [email protected]


